Set Up An E-Invoice
When you first view orders, you will be prompted to set-up E-Invoicing. You can click on the “finish E-Invoicing Setup” or go into your Admin Tab. You will be redirected to this page. Next, you will fill out the required information.
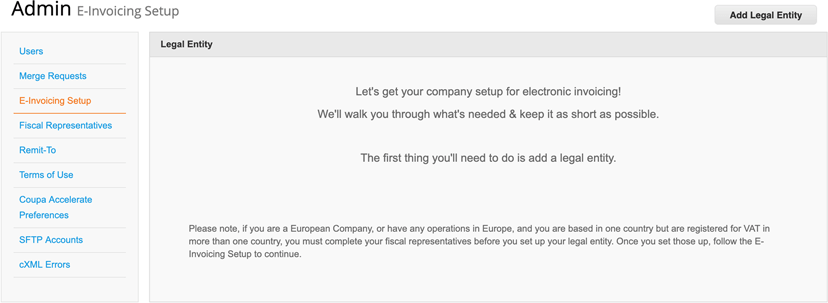
Step 1
- Click on the ”Admin” tab at the top of the page.
- Click on “E-Invoicing Setup”. This link is located on the left hand side of the page in a light gray box.
- Click on “Add Legal Entity” button on the upper right side of the page. Enter the following:
- Legal Entity Name
- Country
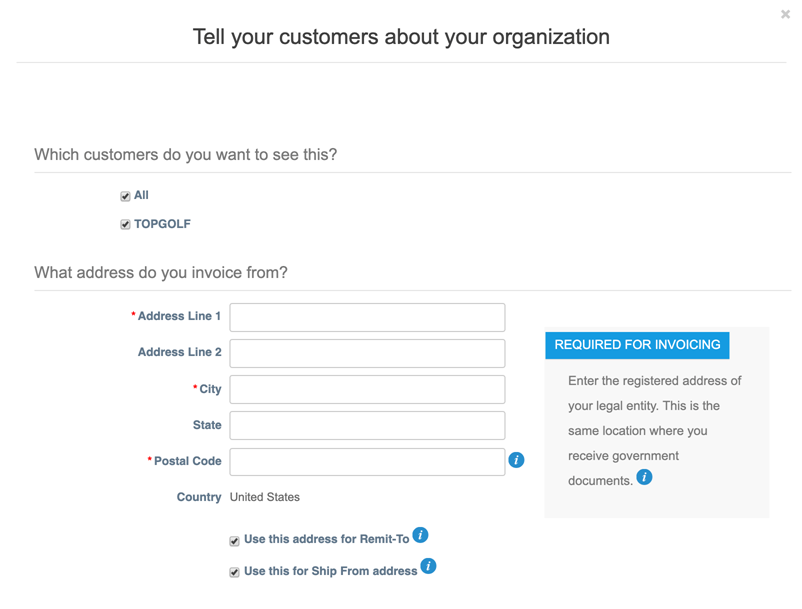
Step 2
You will only need to fill out the fields with the red asterisk (*) and your Tax ID.
Note: If you do not want to use this address for “Remit-To” then you will uncheck the box and be redirected to another page to create a “Remit-To” address.
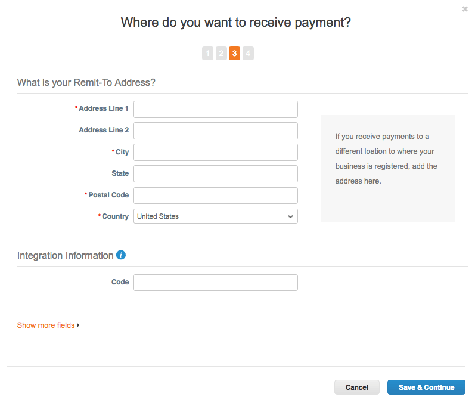
Step 2A
- You will be redirected to a page to add in your Remit-To address. You will only need to fill out the fields that are marked with a red asterisk (*).
- Once the information is filled in, click “Save & Continue”.

Step 2B
- Review where do you ship from address.
- If everything is correct, click “Next”.
- If you need to edit anything, click “Manage”.
Once you get to this page, click on “Go to Orders”.